
What Tools Do I Need for a DIY Room Painting Project?
Summary
- Humidity in Tampa changes tool choices, dry times, and cleanup plans
- Surface prep tools matter more than fancy brushes for a smooth finish
- Buy the basics, borrow specialty gear you’ll use once
- Match paint and finish to room moisture and traffic, not just color
- Know when stubborn stains, texture, or height call for pro help
Introduction
We’re a local handyman crew working across Tampa Bay, and we see the same pattern every summer: a homeowner grabs paint and a roller on Saturday morning, fights sticky walls and slow dry times by afternoon, and spends Sunday fixing drips they didn’t catch because humidity kept the paint open too long. Painting a room here isn’t complicated, but Tampa’s moisture, textured walls, and past repaint layers mean the right tools and prep are half the job.
Below is a practical, tool-first guide drawn from homes we service in Seminole Heights, Carrollwood, South Tampa, and up the Veterans corridor. We’ll call out what first-timers forget, what’s worth buying versus borrowing, and where even experienced DIYers end up calling house painters in tampa florida after the third coat still looks uneven.
Why prep and tool choice matter in humid Tampa interiors
Humidity stretches dry times and softens latex paint while it cures. That means more chance for roller tracks, lap marks, and tape bleed. In older block homes, salt and past moisture leave chalky residue that blunts adhesion. Tools that don’t matter much in drier places—like dehumidifiers, quality tape, shellac primers, and a roller with the right nap—make or break results here.
Local pattern we see
- Afternoon storms spike indoor humidity. If you cut-in at 11 a.m. and roll at 3 p.m., the edges may still be tacky—leading to visible lines.
- AC set above 75 prolongs tack time; below 70 can cause condensation on cold exterior walls. Aim for steady 72–74 with airflow.
- Ceilings and exterior walls gather mildew quicker. Without a mildewcide-primer pass, stains bleed right through fresh paint.
Core tool kit for a Tampa room paint (what actually gets used)
| Category | Tools | Why here |
|---|---|---|
| Prep & Repair | 6-in. taping knife; small spackling knife; lightweight spackle; setting-type joint compound; sanding sponge (120/220); pole sander; stud finder; paintable caulk + caulk gun | Deals with textured walls, small settlement cracks, and sanding dust while minimizing gouges |
| Protection | Rosin paper or builder’s paper; plastic sheeting; clean canvas drop cloth; quality painter’s tape (low-tack and sharp-line) | Stops tape bleed on humid days and protects floors from tacky splatter |
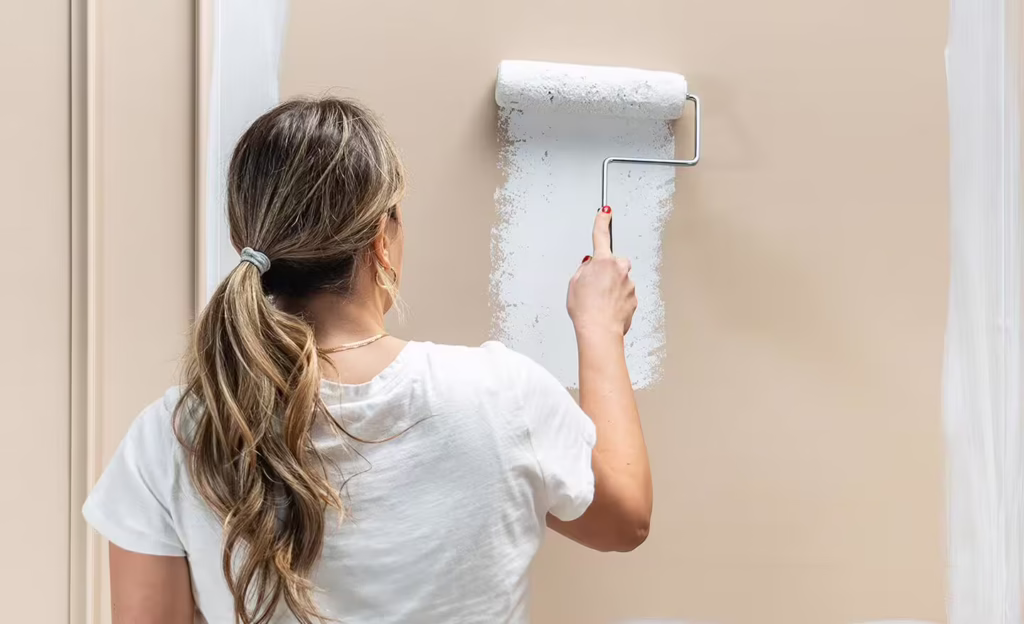
| Application | 2–2.5 in. angled sash brush (nylon/poly); 3–4 in. flat brush for wide trim; 9 in. roller frame; 12–18 in. adjustable frame for big walls; roller covers (3/8 in. for satin/eggshell, 1/2 in. for flat on texture); extension pole | Manages textured walls and longer open times without flashing |
| Priming & Stain Block | Bonding primer; shellac-based spot primer | For chalky old paint and persistent tannin/rust/mildew stains |
| Climate Control | Box fan; small dehumidifier; hygrometer | Keeps relative humidity closer to 50–55% so coats lay down evenly |
| Cutting & Access | 6–8 ft A-frame ladder; adjustable platform; multi-position step stool | Low ceilings + crown/vents demand stable access with minimal repositioning |
| Cleanup | Brush comb; lined buckets; paint strainer bags; contractor trash bags; mild cleaner + mildew remover; nitrile gloves | Prevents gummy brushes and manages mildew-prone areas |
How to assess your walls and prep them (age, texture, repaint history)
Take 15 minutes to inspect before buying paint. What you find determines your tool list.
Quick assessment checklist
- Run a hand over the wall. If it feels dusty/chalky, add a bonding or masonry primer to your cart.
- Look for yellow/brown spots near AC vents, bathrooms, or past leaks. You’ll need a shellac spot primer.
- Check texture. Heavy orange peel or knockdown needs a 1/2 in. nap roller and a pole sander to knock off high nubs.
- Tape pull test: Stick painter’s tape to a discreet spot and rip it off. If old paint comes with it, plan on more sanding and a bonding primer.
- Shine a light along the wall. Shadows reveal dips and seams. Mark them for spackle or setting compound.
Prep sequence we use in Tampa rooms
- Wash: Mild cleaner for general grime; mildew remover for spots (rinse well). Let dry fully.
- Repair: Spackle nail holes; use setting compound for bigger seams; sand with 120 then 220.
- Caulk gaps at trim/crown: Use paintable caulk; tool smooth; allow skin to form.
- Prime strategically: Bonding primer where chalky; shellac on stains and knots; standard primer over repairs.
- Mask smart: Use sharp-line tape on trim after primer cures; press edges with a putty knife.
| Condition | Tell-tale sign | Prep tools you’ll need | Notes |
|---|---|---|---|
| Chalky paint | White residue on hand | Bonding primer, pole sander, tack cloth | Skipping primer leads to roller slip and poor adhesion |
| Heavy texture | Orange peel/knockdown | 1/2 in. roller, sanding sponge, extension pole | Thinner naps leave skip marks on peaks |
| Mildew staining | Gray/black freckles | Mildew remover, shellac spot primer | Paint without treatment = stains reappear |
| Peel-prone layers | Tape lifts paint | 220-grit, bonding primer, patience | Multiple thin coats beat one heavy coat |
Paint type and finish by room use (bathrooms vs. bedrooms vs. kitchens)
Finish matters more than the brand in Tampa’s humidity. Pick sheen for wipeability and moisture resistance.
| Room | Finish | Why it works here | Extra tools/steps |
|---|---|---|---|
| Bathroom | Satin or semi-gloss | Better moisture tolerance and scrubbability | Run fan/dehumidifier; spot-prime mildew; use high-quality caulk |
| Kitchen | Satin | Easier grease cleanup without highlighting wall flaws | Degrease first; consider a washable line |
| Bedroom | Flat/Matte (low-traffic) or Eggshell (kids/pets) | Hides imperfections; eggshell cleans better | Use 3/8 in. nap for smoother finish |
| Ceilings | Dead flat | Conceals seams and patches under raking light | 12–18 in. roller with extension pole reduces lap marks |
If you’re weighing a cabinet refresh too, our walk-through on painting bathroom cabinets like a pro covers the extra sanding, degreasing, and priming steps cabinets need in this climate.
Brushes vs. rollers: what works better in Florida conditions
When a brush wins
- Trim, doors, and tight corners where tape bleed is risky on humid days.
- Cutting-in along textured ceilings; an angled sash brush gives more control than tape under popcorn or knockdown.
When a roller rules
- Large walls and ceilings—especially when humidity keeps paint open. A quality roller lays even film thickness faster, reducing lap marks.
- Textured surfaces. A 1/2 in. nap reaches valleys where brushes telegraph strokes.
Local tip
Load less, roll more. In high humidity, heavy loads sag. Use a paint grid in a bucket instead of a tray; it controls loading and is safer to move around on tile floors.
Tools first-time DIYers forget or misuse
- Hygrometer: If indoor RH is 65%+, expect slow drying and more bleed. Run AC and a fan until you’re near 50–55%.
- Shellac spot primer: Latex primer won’t lock in certain stains. We see this missed constantly.
- Brush comb: Keeps bristles straight; a $6 tool that doubles brush life.
- Sharp-line painter’s tape: Cheap tape + humidity = fuzzy edges and peel-ups.
- Extension pole: Safer and faster than climbing a ladder for every pass; also evens pressure for fewer roller tracks.
- Paint strainer bags: Strain after opening; old cans and store tints shed debris that shows up on long, humid cures.
If you’re stocking a simple home tool chest beyond painting, our guide to a basic homeowner tool kit pairs well with this list.
Which tools are worth borrowing vs. buying
| Tool | Buy | Borrow/Rent | Reason (Tampa-specific) |
|---|---|---|---|
| Angled sash brush (2–2.5 in.) | Yes | No | You’ll use it every room; personal feel matters |
| Quality roller frame + poles | Yes | No | Frames flex differently; a sturdy one controls roller chatter on textured walls |
| Dehumidifier | Maybe | Yes | Handy for summer projects, but not a daily tool for most |
| Adjustable 12–18 in. roller | No | Yes | Great for big rooms; borrow if you won’t use it often |
| Shellac primer (quart) | Yes | No | Small can handles common stains and lasts across projects |
| Work platform | Maybe | Yes | Useful in hallways and bathrooms; rent/borrow unless you do lots of painting |
Budget paths (starter vs. standard vs. pro-ish)
| Kit | What’s included | Approx. spend | When to choose |
|---|---|---|---|
| Starter | 1 brush, 9 in. roller/frame, tray, tape, spackle, sanding sponge, drop cloth | Low | Small bedroom with decent walls |
| Standard | Starter + bonding primer, shellac spot primer, extension pole, canvas drop, hygrometer | Moderate | Most Tampa rooms with texture or minor stains |
| Pro-ish | Standard + 12–18 in. roller, dehumidifier rental, work platform, bucket + grid | Higher | Large living rooms, high ceilings, or summer projects |
Step-by-step: a Tampa-tested painting checklist
- Control climate: Set AC to ~72–74 and run a fan; aim for RH 50–55%.
- Clear and protect: Move furniture, cover with plastic; paper the floor at the perimeter, canvas down the main path.
- Clean and degloss: Wipe walls; degrease kitchens; treat mildew and rinse.
- Patch and sand: Fill holes, seams; sand flush; dust off.
- Prime where needed: Bond chalk, spot-prime stains, prime repairs.
- Mask smart: Tape after primer is dry to the touch but before it fully cures; press edges.
- Cut-in: Use an angled brush; keep a wet edge—all four sides.
- Roll: Work in 3×3 sections; reload lightly; overlap passes while still wet.
- Second coat: Wait longer than the can suggests if RH is high; test a hidden spot.
- Unmask sooner: Pull tape at a 45° angle while paint is slightly soft to prevent tearing.
Ladder safety and room layout tips most folks ignore
- Use the right height: An 8 ft A-frame reaches most 9–10 ft ceilings without overreaching.
- Mind tile and terrazzo: Ladder feet slide on smooth floors. Use rubber feet or a drop cloth that doesn’t bunch.
- Lay out your route: Start with the wall opposite the main light source; small flaws are less visible there if you’re learning.
- Vent returns and supply registers: Shut off the air while cutting around vents so dust doesn’t blow into fresh paint.
- Door schedule: Paint the door last so you can move gear in and out without scuffs.
Cleanup tools that save time (and prevent damage) in high-moisture homes
- Brush comb + lukewarm water: Restores bristle shape; hang to dry—don’t lay flat in our humidity.
- Paint grid in a bucket: Snap on a lid between coats; slows skinning if a storm spikes moisture.
- Strainers: Reuse partially skinned paint by straining before the next coat.
- Dehumidifier or AC hold: Run for a few hours post-paint to help early cure and reduce tacky dust pickup.
- Mildew watch: In bathrooms and exterior walls, check the next day and spot-prime any ghosting before a second coat.
Scenarios: what changes your tool list
| Scenario | What to add | Why |
|---|---|---|
| Heavy texture + flat finish | 1/2 in. roller; pole sander | Fills valleys; smooths proud nubs |
| Past smoker’s room | Shellac primer; extra strainer bags | Tar bleeds and clogs rollers |
| Recent water stain | Moisture meter (optional); shellac primer | Confirm it’s dry; block stains fully |
| Summer project without AC | Box fan; dehumidifier; fast-setup roller system | Controls dry time; reduces dust in sticky paint |
FAQs
Do I really need primer if I’m using a paint-and-primer can?
On clean, sound walls, maybe not. On chalky, stained, or patched Tampa walls, a dedicated bonding or shellac primer solves problems that “all-in-one” cans don’t.
What nap roller should I pick for our textured walls?
Usually 3/8 in. for light texture and eggshell/satin, 1/2 in. for heavier texture or flat ceilings. If you see skips, bump the nap up; if you see orange peel, lighten your load and roll out more.
How long between coats in our humidity?
Longer than the can. If RH is near 60%, we often wait 6–8 hours for walls, longer for trim. A touch test in a hidden spot is better than the clock.
Can I leave tape on overnight?
You can, but in Tampa it often bonds harder by morning. We pull as soon as the coat sets up—still soft enough to slice cleanly.
When pros typically intervene
We end up behind a lot of DIY jobs for a few repeat reasons:
- Persistent stains or mildew that telegraph through two coats even after cleaning—needs shellac, better prep, and sometimes patch replacement.
- Peeling over old oil or glossy paint—calls for deglossing, heavier sanding, and bonding primers.
- Vaulted ceilings, stairwells, and two-story walls—access and safety trump enthusiasm.
- Textured ceilings that meet walls—cutting a straight line without lifting texture is not beginner-friendly.
- Moisture intrusion from the envelope—paint won’t fix a leak; the stain will return.
In those cases, homeowners often bring in house painters in tampa florida or ask us to step in with the right primers, platforms, and process. If your test patches keep flashing or peeling, stop and reassess tools and prep before throwing more coats at it.
Conclusion
In Tampa, the right painting tools aren’t a luxury—they’re insurance against humidity, texture, and the ghost of old coats. Spend your money on surface prep, controlled climate, and a few reliable applicators. Borrow the specialty gear you’ll rarely touch. When the wall tells you it has a history—stains, chalk, peel—believe it and reach for primers and sanding before another coat. A clean, even finish here is more about patience and sequence than brand labels, and the room will show whether you respected that or tried to rush past it.